Angel Garcia
Member
The Boot Camp Assistant included in Mac OSX (Leopard) only allows to have either a single Mac partition or a 2-partition scheme MacOSX / Windows. Some people (me included) prefers to have their data in a separate, dedicated partition rather than using the same partition as the OS. Here I explain how to achieve it.
1- Use the Boot Camp Assistant for creating a standard Boot Camp configuration. The size for the Windows partition should be the neccessary for Windows and your Windows Applications only, as your data will be stored in a different partition. Follow the Assistant until you get a Windows installed and working via BootCamp.
NOTE: These instrucctions assume that you've chosen NTFS file format when asked by the Windows installer.
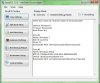
2- Use the WinClone application for creating an image file of the Windows partition. WinClone lets you select the partition and will store it in a single file that can be restored anytime. This is a MANDATORY step, even if you have some other way for creating backup files / images. You'll see why later.
3- In Mac OS open the Disk Utility. Resize the Macintosh HD partition in order to leave an emtpy space between this partition and the Windows partition. This empty space will hold your Data partition, so leave as much space as you want for it. Then create a new Partition in the empty space.
Detailed steps:
- Open Disk Utility
- Select your hard disk from the left list.
- Click Partitions
- Click the first partition (Macintosh HD). Drag its lower-right corner in order to leave an empty space.
- Click the [+] button below the partition schema. A new partition will be created filling the empty space.
- Click Apply.
4- Reboot your Mac. This is neccesary so each partition could receive their proper id acording to their order in the disk.
5- Format the new partition so it can be accessed from Windows (NTFS or FAT32).
5A- If you want FAT32 in your Data partition:
- Open Disk Utility
- Select the second partition from the left list (the partition directly under "Macintosh HD").
- Click Erase
- Select "MS-DOS (FAT)" as volume format.
- Name it "Data"
- Click Erase.
5B- If you want NTFS in your Data partition:
You need to download and install MacFUSE, then NTFS-3G for Mac (ublio version recommended). Both tools are painless to install and can be easily removed later if you decide not to use NTFS.
Once installed, the NTFS file system is added to the list of formats for erasing a partition in Disk Utility. However it cannot be used directly here because NTFS-3G doesn't have permissions, and it seems not to be clever enough for requesting your password.
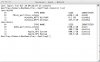
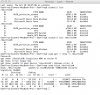
If you have followed the previous steps then the new partition has the identifier disk0s3. You can verify that by typing "diskutil list" in Terminal. So in order to format it as NTFS open Terminal and type:
Enter your password, then you'll get our Data partition formatted as NTFS.
6- Use WinClone for restoring the Windows image file created at step 2.
Why, if you haven't changed anything? Because as the partition scheme has changed, Windows no longer boots in Boot Camp (it may even have disappeared from the Boot menu). After restoring the image file, WinClone adjusts and fixes *everything* so Windows will boot again perfectly. The restoration itself is pointless, but I haven't found any better/easier way for getting Windows back to work.
Detailed steps:
- Open WinClone
- Click Restore
- Click "Select Image", then choose the file created at step 2.
- Select the Windows partition at Destination (/dev/disk0s4).
- Click the lower Restore button.
NOTE (FAT32 only): If you have formated your Data partition as FAT32, then you'd better delete and re-create it again now. For some reason, WinClone (version 2.0.10) marks both Data and Windows partitions as NTFS in the partition table. This doesn't seem to have any effect, but I believe it's better to have them right (and it's easy to do):
- Open Disk Utility
- Select the hard disk, then click Partitions.
- Delete the Data partition [-] then recreate it [+]. Click Apply.
- Restart Disk Utility, so the new partition appears in the left list.
- Select the new partition in the left list, then click Erase
- Choose FAT32 as volume format, name it Data, and click Erase.
- Reboot your Mac.
Your Data partition is now ready and can be used from both Mac OSX and Windows. You could also boot your Windows from Parallels Desktop using a Boot Camp based virtual machine, but by default it won't detect the Data volume properly. You can fix that by following these instructions (Creating custom Boot Camp configurations in Parallels Desktop 4).
1- Use the Boot Camp Assistant for creating a standard Boot Camp configuration. The size for the Windows partition should be the neccessary for Windows and your Windows Applications only, as your data will be stored in a different partition. Follow the Assistant until you get a Windows installed and working via BootCamp.
NOTE: These instrucctions assume that you've chosen NTFS file format when asked by the Windows installer.
2- Use the WinClone application for creating an image file of the Windows partition. WinClone lets you select the partition and will store it in a single file that can be restored anytime. This is a MANDATORY step, even if you have some other way for creating backup files / images. You'll see why later.
3- In Mac OS open the Disk Utility. Resize the Macintosh HD partition in order to leave an emtpy space between this partition and the Windows partition. This empty space will hold your Data partition, so leave as much space as you want for it. Then create a new Partition in the empty space.
Detailed steps:
- Open Disk Utility
- Select your hard disk from the left list.
- Click Partitions
- Click the first partition (Macintosh HD). Drag its lower-right corner in order to leave an empty space.
- Click the [+] button below the partition schema. A new partition will be created filling the empty space.
- Click Apply.
4- Reboot your Mac. This is neccesary so each partition could receive their proper id acording to their order in the disk.
5- Format the new partition so it can be accessed from Windows (NTFS or FAT32).
5A- If you want FAT32 in your Data partition:
- Open Disk Utility
- Select the second partition from the left list (the partition directly under "Macintosh HD").
- Click Erase
- Select "MS-DOS (FAT)" as volume format.
- Name it "Data"
- Click Erase.
5B- If you want NTFS in your Data partition:
You need to download and install MacFUSE, then NTFS-3G for Mac (ublio version recommended). Both tools are painless to install and can be easily removed later if you decide not to use NTFS.
Once installed, the NTFS file system is added to the list of formats for erasing a partition in Disk Utility. However it cannot be used directly here because NTFS-3G doesn't have permissions, and it seems not to be clever enough for requesting your password.
If you have followed the previous steps then the new partition has the identifier disk0s3. You can verify that by typing "diskutil list" in Terminal. So in order to format it as NTFS open Terminal and type:
Code:
sudo diskutil eraseVolume "NTFS-3G" Data /dev/disk0s3Enter your password, then you'll get our Data partition formatted as NTFS.
6- Use WinClone for restoring the Windows image file created at step 2.
Why, if you haven't changed anything? Because as the partition scheme has changed, Windows no longer boots in Boot Camp (it may even have disappeared from the Boot menu). After restoring the image file, WinClone adjusts and fixes *everything* so Windows will boot again perfectly. The restoration itself is pointless, but I haven't found any better/easier way for getting Windows back to work.
Detailed steps:
- Open WinClone
- Click Restore
- Click "Select Image", then choose the file created at step 2.
- Select the Windows partition at Destination (/dev/disk0s4).
- Click the lower Restore button.
NOTE (FAT32 only): If you have formated your Data partition as FAT32, then you'd better delete and re-create it again now. For some reason, WinClone (version 2.0.10) marks both Data and Windows partitions as NTFS in the partition table. This doesn't seem to have any effect, but I believe it's better to have them right (and it's easy to do):
- Open Disk Utility
- Select the hard disk, then click Partitions.
- Delete the Data partition [-] then recreate it [+]. Click Apply.
- Restart Disk Utility, so the new partition appears in the left list.
- Select the new partition in the left list, then click Erase
- Choose FAT32 as volume format, name it Data, and click Erase.
- Reboot your Mac.
Your Data partition is now ready and can be used from both Mac OSX and Windows. You could also boot your Windows from Parallels Desktop using a Boot Camp based virtual machine, but by default it won't detect the Data volume properly. You can fix that by following these instructions (Creating custom Boot Camp configurations in Parallels Desktop 4).
Last edited: