How to manual install CentOS 7

GreenW

Bit poster
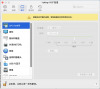
I am running parallels desktop 17.1.4 and want install CentOS 7 manually. My system version is macOS Monterey 12.2.1
I download the iso of " CentOS-7-x86_64-DVD-2009.iso"
First i click "New" in parallels desktop and make some config about cpu / memory / disk
when i select the iso and start the virtual machine
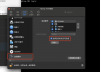
the installation process stop at
"Not asking for VNC because we don't have a network"
so can anyone help me about this problem, thanks
my vm specs was 2C2G
 

Attachments

  • WX20220706-084051@2x.png
    WX20220706-084051@2x.png
    145 KB · Views: 21
  • WX20220706-104828@2x.png
    WX20220706-104828@2x.png
    200.4 KB · Views: 18
I download a "CentOS-7-x86_64-DVD-1810.iso" image and try to install manually
there is also the "Not asking for VNC because we don't have a network" tips but it slash over
then the install graphic appeared and i can install sucessfully.
so is this a compatible bug for parallels desktop ?
 
I download a "CentOS-7-x86_64-DVD-1810.iso" image and try to install manually
there is also the "Not asking for VNC because we don't have a network" tips but it slash over
then the install graphic appeared and i can install sucessfully.
so is this a compatible bug for parallels desktop ?
Hello, "Not asking for VNC because we don't have a network" / "X startup failed, aborting installation" / "Pane is dead" error during installation. The boot mode in use may be causing these error messages. Try to install after enabling both UEFI and Legacy boot modes. If that doesn't help, then disable one and try the other. For installation guidance please refer to this KB article.
 
Steps are given below-
Step 1: Begin Installation
First of all, you have to download a CentOS image from the download section of the project website. Then, make a USB bootable and then restart the computer.

To begin installation, click on the Install to Hard Drive icon on the desktop.

Step 2: Select Language And Keyboard
Select your preferred language as well as the Keyboard type you have.

Step 3: Change The Installation Destination
By default, the Anaconda installer will choose automatic partitioning for your hard disk. Click on the Installation Destination icon to change this to custom partitioning.

Click on the hard drive you want to install CentOS 7 and under the Other Storage Options, choose I will configure partitioning then click Done.

Step 4: Select The Partitioning Scheme
Next, select the partitioning scheme to use for the mount points.

After that, accept the changes to apply them.

Step 5: Set Date And Time
Click on the clock icon under the localization menu and select a time zone from the map of the world, then click Done.

Once you have chosen the time and date as well as the timezone, you will see a summary of the installation. This is a good time to review all changes carefully.

Step 6: Begin Installation
Now after configuring the System and Localization settings you can click on the Begin Installation button.

The installation will begin immediately and as it proceeds you need to set up a User account as well as the root password.
Click on the root password option and enter a password and confirmation of the same then click Done. I recommend that you use a strong password to prevent it from being stolen or guessed by others. The next step is to create a user account. Enter the correct details and if this is the administrator account, tick Make this user administrator and Require a password to use this account for security purposes.
After that, the process will continue.
Then, the installer should complete installing the software and the bootloader.
Once complete you should get a success message, after which you can click quit.

This may help you,
Rachel Gomez
Hello, we appreciate your response.
 
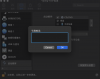
I check the boot order option , but no effect.
 

Attachments

  • WX20220721-235508@2x.png
    WX20220721-235508@2x.png
    339.5 KB · Views: 27
  • WX20220721-235521@2x.png
    WX20220721-235521@2x.png
    226.2 KB · Views: 26
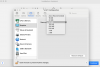
I had the same issue (installer stuck on "Not asking for VNC because we don't have a network") when using custom install. Setting the Graphics memory to "Auto" solved the problem for me.Screenshot 2022-07-30 at 08.43.00.png
 
My bad, please make sure to also disable 3D-acceleration (click the "Advanced" button in Graphics settings to disable).
Great, It works.
There also the message, but the installation can continue to next step.
Thank you very much.
 
Been struggling with this today (CentOS-7-x86_64-DVD-2009.iso) and can confirm that disabling 3-d acceleration and setting graphics to auto fixed it for me too (Parallels Pro v18.0.3, MacOS 13.0 Host). Thanks.
 
Does anyone know how to get it to go on Mac OS 13? I can't find the settings to turn off#D or set graphics to Auto
 
Hey there! I've had a similar issue with installing CentOS 7 manually on Parallels Desktop. It sounds like the problem might be related to the network settings.
 
Hey there! I've had a similar issue with installing CentOS 7 manually on Parallels Desktop. It sounds like the problem might be related to the network settings.


Have you tried checking the network settings in your virtual machine to make sure everything is set up correctly? Also, I recommend checking out tuxcare.com for extended support for when CentOS 7 reaches its end of life in 2024. They offer additional 4 to 7 years of support including security patching, so you don't have to rush to migrate away from CentOS 7. Good luck!
 
Good day! Similar problems occurred when I manually installed CentOS 7 on Parallels Desktop. It sounds like the network settings may be the cause of the issue.
 
Back
Top