We request you to share us a screenshot of the VM configuration for the hard disk.Dear Team,
there are clearly issues here and we need help asap. I have been through most articles and suggestions to no avail - can you please respond urgently.
Bernd

Install the app
How to install the app on iOS
Follow along with the video below to see how to install our site as a web app on your home screen.
Note: This feature may not be available in some browsers.
You are using an out of date browser. It may not display this or other websites correctly.
You should upgrade or use an alternative browser.
You should upgrade or use an alternative browser.
Can't increase VM disk size in El Capitan 10.11.1 (Parallels 11.1.0)
- Thread starter NeilR1
- Start date
mr.macintosh
Bit poster
Dear all Parallels-Users experiencing the same issue as I do:
Resizing an OS X 10.11.X El Capitan virtual machine's hard disk size does not reflect within the guest system itself. I. e. El Capitan within Parallels still shows a disk size of round about 30G, whatsoever. I just found a solution to this issue and I hope to reach any of the other customers who might have given up on this given the fact this forum post is older than two years and Parallels Support clearly has failed to understand this:
(the following steps are all to be performed within the virtual machine, i. e. Parallels, not on your host system)
Open Terminal within the guest system and type
diskutil list
you will most likely see some reference to a CoreStorage volume such as
Logical Volume on disk0s2
Next, type
diskutil cs list
Copy the last UUID starting with UUID and paste that in a new command as follows (without the brackets)
diskutil cs revert (UUID)
Reboot. Now your virtual machine is no longer within a disk image within a CoreStorage layout but shows the exact volume size reflects what was set within Parallels' configuration settings.
Resizing an OS X 10.11.X El Capitan virtual machine's hard disk size does not reflect within the guest system itself. I. e. El Capitan within Parallels still shows a disk size of round about 30G, whatsoever. I just found a solution to this issue and I hope to reach any of the other customers who might have given up on this given the fact this forum post is older than two years and Parallels Support clearly has failed to understand this:
(the following steps are all to be performed within the virtual machine, i. e. Parallels, not on your host system)
Open Terminal within the guest system and type
diskutil list
you will most likely see some reference to a CoreStorage volume such as
Logical Volume on disk0s2
Next, type
diskutil cs list
Copy the last UUID starting with UUID and paste that in a new command as follows (without the brackets)
diskutil cs revert (UUID)
Reboot. Now your virtual machine is no longer within a disk image within a CoreStorage layout but shows the exact volume size reflects what was set within Parallels' configuration settings.
Thank you mr. macintosh. However, this did not work for me. Perhaps you have a further idea? Here is what happened for me. I increased El Capitan disk size from 128GB to 256GB. Then I had the problems everyone has reported with Disk Utility. I opened Terminal in the El Capitan virtual machine When I typed diskutil list, there was no reference to CoreStorage. Rather, there were 4 items. #0 GUID_partititon_scheme 275 GB, #1 EFI 210MB, #2Apple_HFS Macintosh HD 68GB, and #3 Apple_Boot Recovery HD 650 MB. Typing diskutil cs list returned "No CoreStoreage logical volume groups found".Dear all Parallels-Users experiencing the same issue as I do:
Resizing an OS X 10.11.X El Capitan virtual machine's hard disk size does not reflect within the guest system itself. I. e. El Capitan within Parallels still shows a disk size of round about 30G, whatsoever. I just found a solution to this issue and I hope to reach any of the other customers who might have given up on this given the fact this forum post is older than two years and Parallels Support clearly has failed to understand this:
(the following steps are all to be performed within the virtual machine, i. e. Parallels, not on your host system)
Open Terminal within the guest system and type
diskutil list
you will most likely see some reference to a CoreStorage volume such as
Logical Volume on disk0s2
Next, type
diskutil cs list
Copy the last UUID starting with UUID and paste that in a new command as follows (without the brackets)
diskutil cs revert (UUID)
Reboot. Now your virtual machine is no longer within a disk image within a CoreStorage layout but shows the exact volume size reflects what was set within Parallels' configuration settings.
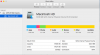
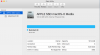
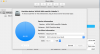
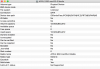
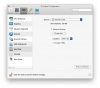
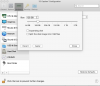
To Ajith@Parallels. To respond to Ajith's post from 3 years ago, I am uploading 4 images from Disk Utility. I should caveat that I had ZERO available disk space, and every time I created some by deleting files, my MacintoshHD immediately shrunk in size so I was effectively unable to create ANY free disk space. Just in order to make these screenshots I was forced to shut down El Capitan, then change the hard drive to "non-expanding" (I think that was the checkbox). That took 2 hours. After I rebooted, my freed-up space was available. So these screen shots are based on having changed to "non-expanding" but they look the same as before as best as I can recall.
Ken Cunningham
Member
I can't tell from the above if you solved your problem or not, but I also ran into this issue and found a workaround.
In Parallels, in the VM configuration screen, add another hard drive -- I picked a big expanding drive this time, 512GB (should have done that the first time, in retrospect). Then boot up the VM, and use a cloning software tool -- I like Carbon Copy Cloner -- to clone your original hard drive to the new larger one. That took not terribly long, and went successfully.
There is a trial period available on CCC to let you try this out. I will note I had to install CCC onto the VM's HD and I also unmounted the shared volumes before cloning -- the first time I tried this, CCC didn't like being run from a network share and didn't like to see the shared files volume in Parallels VM, and came up with an error about not being able to write files to see if it was a case-sensitive file system.
Then I shut down the VM, and in Parallels VM configure screen again, removed the original hard drive (I didn't delete the files at this point, just in case), and I set the new larger hard drive to to have the location SATA:0:1 like the old one had.
Then started up the VM, and all was as it should be -- the new hard drive, which is a clone of the old hard drive, now had 512GB of total space, of which a small amount was used (the old HD was 64GB, and was pretty much full). And now it looks like all is well.
After a while goes by, if there are no visible problems, I will delete the original HD file to reclaim my 64GB.
I hope this helps someone.
In Parallels, in the VM configuration screen, add another hard drive -- I picked a big expanding drive this time, 512GB (should have done that the first time, in retrospect). Then boot up the VM, and use a cloning software tool -- I like Carbon Copy Cloner -- to clone your original hard drive to the new larger one. That took not terribly long, and went successfully.
There is a trial period available on CCC to let you try this out. I will note I had to install CCC onto the VM's HD and I also unmounted the shared volumes before cloning -- the first time I tried this, CCC didn't like being run from a network share and didn't like to see the shared files volume in Parallels VM, and came up with an error about not being able to write files to see if it was a case-sensitive file system.
Then I shut down the VM, and in Parallels VM configure screen again, removed the original hard drive (I didn't delete the files at this point, just in case), and I set the new larger hard drive to to have the location SATA:0:1 like the old one had.
Then started up the VM, and all was as it should be -- the new hard drive, which is a clone of the old hard drive, now had 512GB of total space, of which a small amount was used (the old HD was 64GB, and was pretty much full). And now it looks like all is well.
After a while goes by, if there are no visible problems, I will delete the original HD file to reclaim my 64GB.
I hope this helps someone.